Facebook Instagram Pinterest Shop

Designs by TiffanyCo

  • Home
  • Freebies
  • DIY Projects
  • Parties
    • Birthday
    • Baby Shower
  • Portfolio
  • Design Service Prices
  • Etsy Shop
  • About
  • Contact
Chaosity = kay-os-i-tee  .  chaos and insanity put together  .  Her life was in such a mess that it turned into chaosity. (This is legit, guys!)

Hey ya'll! As you know school has started and if any of you have actually read my little bio here, you would know that I'm still in school, desperately trying to finish. Because of school, my schedule has already become a little hectic and I know I won't be able to add much to this blog. My priorities right now are school and family, but I'll try my best to make time for this too! I've already gotten a little bit of recognition so far from Debra Bass, a St. Louis Today Fashion Editor with my Toilet Paper Art coming soon on an article that she's doing! (I won't go into much detail. I already hope I'm not spoiling anything because I'm talking about this now before it actually makes it into the paper...) So I'm sad that I can't continue on with promoting my blog and doing as much as I can to make it better.

BUT in the meantime, I'm taking a UI/IX Design class which will help me learn coding! So later I'll be able to make this website, or even make my own website so much better! It's exciting! Because, this site ain't got no style and things going where I want them to go.

So, stay with me, people! I'll probably be doing more recipes than crafts because I'm always trying new meals from Pinterest. And then come Christmas-time, I'll have a lot of cute crafty decor coming along from stuff I did last year. And of course I'll share some of my design work from school. So I guess my blog won't become too much of a dead-beat, but just know there might be some dry-spells happening.

Hang with me and love you guys!
Share
Tweet
Pin
Share
1 comments

We all have it: that one white shirt with the pit stains. Most of us replace it with a new one when needed or shamefully hang it in our closet thinking one day we'll deal with it and bleach it. But not anymore! I saw this pin from One Good Thing about taking the yellow sweat stains out of white shirts and knew I needed to try it. What did I have to lose if I was going to replace the shirt anyways?

She had fantastic results and I was pretty trusting that it would work. So here we go!


You mix one part Dawn dishwashing liquid mixed with two parts hydrogen peroxide plus some baking soda. Scrub onto stains and do your laundry as usual. I also dabbed it on some areas where there were other stains like chocolate or something.


Then after it's done laundering, voila! Stains GONE! It really is miracle cleaner. It got the odd older stains out too!


Test Approved!
Share
Tweet
Pin
Share
No comments
It's been fun seeing some growth and awareness of my blog and shop come from this event. I've been noticing that this clementine ombre print has easily become a favorite so far! I'm so glad you guys like it!

Remember to enter in the giveaway because it ends tonight so you have a chance to win this or anything else from my shop!

Share
Tweet
Pin
Share
No comments

Growing up my mother had made a few quiet books for us kids to entertain ourselves during church. Me being the youngest of 5, by the time I played with the books many of the pieces were missing. But it didn't matter. I loved those books. As I got older I knew it would be one of my first priorities to make for my own kids so they could have the same memories that I had. 

Because making your own require A LOT of time and resources, I've been putting it off until now. I knew this summer would be the perfect time because I had the time and Avery was getting to the age of being able to actually enjoy them for their purpose. 

Most of the pages I copied from my mom's books, but some I made up and others I found online. If you are interested in how any of the pages are made or would like me to provide traceable printables, don't hesitate to ask! I traced most of the drawn ones from her books and I can make some for you to use for yourself! 

* Some tips I have learned from making mine are:
1. Don't buy a permanent fabric pen! Unless you plan on washing it, just use a fine-tip sharpie or maybe even a pen. Don't waste $5 on something that can be cheapily replaced.  
2. For the pages that look like they're colored, it's because they are! I found out that you can color on the fabric with colored pencils for some nice color without all of the bulky felt fabrics. (But again, only do if you plan on never washing it.)
3. Machine sew as much as you can. It'll keep it lasting longer through all of the tugging from you little ones.


Every page is made out of basic materials consisting of mostly felt and notions. I'll mention what type of notions I used for each page, but know that most of the main material is felt.

Book One: 
Colors, Shapes, Misc.
Stoplight and Vase of Flowers
(velcro and buttons)
Ice Cream Cone and Fruit Basket
(velcro)
I had a LOT of fun making the fruit!
Ice cream cone idea from here
Animal Eggs and a Weave
(glue gun)
These animals were also a TON of fun!
Egg idea from here
Apple Tree and Shapes
(snaps and velcro)
Christmas Tree and Caterpillar
(velcro and snaps)
Weather Girl
(velcro)
Now, I made this one up, so we'll see how
child-friendly it is!

Book Two:
Bible & Book of Mormon references
Ruth and Baby Jesus
(Yarn and snaps)
I remember my older sister really loved braiding
Ruth's hair so that one was a must for my book!
Peter Fishing and Noah's Ark
(tool, zipper, & glue gun)
These animals were also a blast to make! Although I
regret making them all a profile.
Liahona
(snaps)
Ancient Temple and Joseph's Coat of Many Colors
(velcro and snaps)
Tithing/matching game
(velcro)

I LOVE how these turned out and it's such a relief to have them finished! I seriously feel like I have all of this time on my hands now that I don't have this nagging me. That won't last long. Time on my hands, but I'm really glad that they're finished! 

Seriously, if you have questions you want answered don't hesitate to email or comment. I mostly just copied my mom's pages, but that's much easier to do when you're able to touch and examine it. As for the binding, I didn't have the tools to make holes for rings, which is why I reverted to the bold hand-stitching. I actually like it. It makes it look playful, like a child did it and it also holds up well. I do want to do something with the covers, but I haven't thought of anything yet, so it sits blank for now.
Share
Tweet
Pin
Share
2 comments
Update: Contest is Over

I have a brand new line of printables in the shop that I'm so excited to share! Just in time too because Taylor from Our Fairy Tale had a great idea to set up a giveaway for me! And if you win, you have the choice to choose one of these cute new sewn printables or anything else from my shop! That's right, my new collection of printables have some sewing mixed in, so they aren't digital downloads, but look super chic and rich with texture with the paper and added texture of the thread.

Also check out Danica's blog Black with a Chance of Cheetah who is going in with Taylor for the giveaway. They're helping me get my name out because they have more followers. Be sure to check out their blogs, both of them are pretty sweet, and you can enter the giveaway there or on here. It ends in 5 days and my sale also ends in 8 days. So if you don't win, but still want something awesome from my shop, you have until the 21st for a sweet deal.


a Rafflecopter giveaway
Share
Tweet
Pin
Share
2 comments
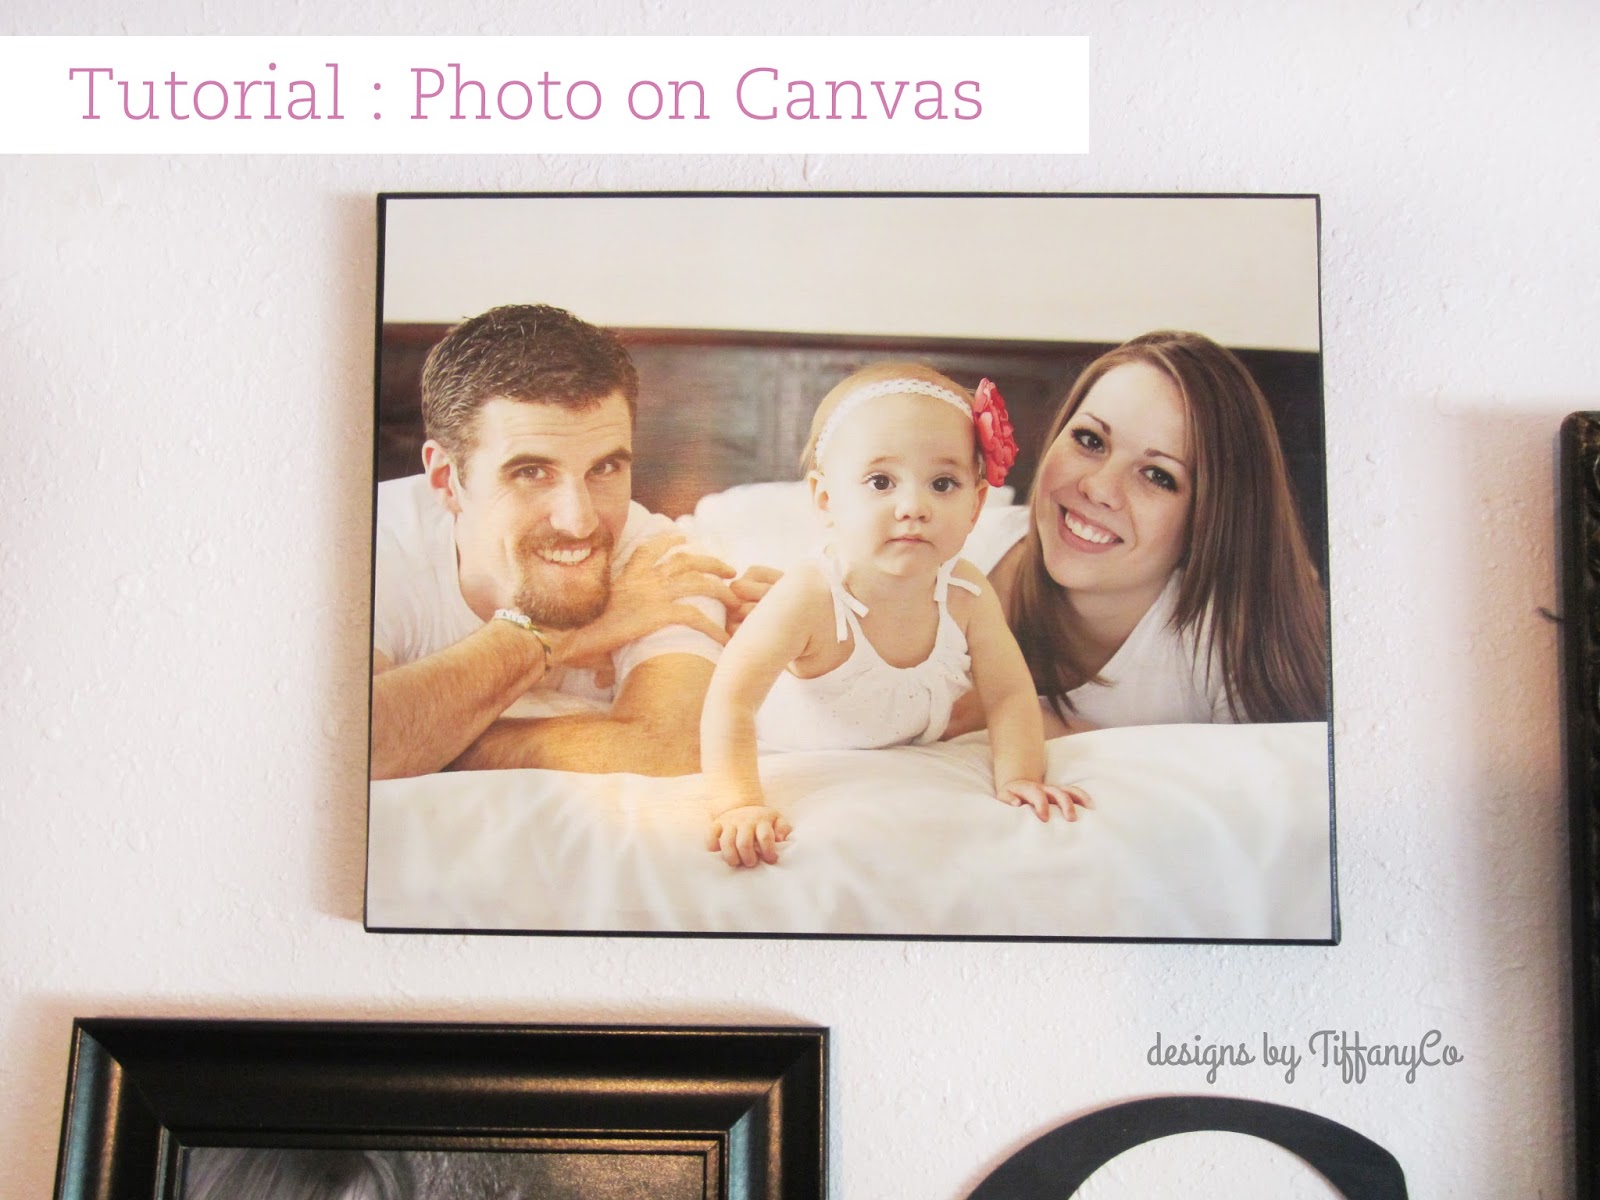
Test Pin/Tutorial: How to put a photo on canvas.


Guys, I have done this a lot. It really works! And I'm super cheap, so I'm getting a canvas look for less than half the cost!! Whoo! This is where I first saw the idea and put it to the test here. She used pieces of wood to make it even cheaper, so you're welcome to follow her instructions if you would like. I almost did mine with wood. I got a big wood board for $1 in the scraps pile at Lowe's only to find out later that they don't do artsy cuts... Which made it so I have this huge wood board sitting around wondering what the heck I'm going to do with it! That will come later. But for now, because I couldn't get that board specifically cut, I decided to just buy a plain canvas and start the whole process from there. So here we go!

Tools you will need:
a canvas that fits the size of your photo 
(What I'm doing is 11x14. Bigger is always better.)
your photo
craft paint of your choice 
(With my photo I did black, but with what I'm about to show you I did grey.)
a sponge paint brush
Modge Podge 
two food cans
paper plate

Step 1: Paint the sides of your canvas. It will take several layers, so be patient and wait until each layer dries so it looks clean and neat. As it dries, place on top of your cans so it doesn't stick to your newspaper or gets mushed around.

Get those corners!
Step 2: After your paint job is done, now it's time to put on your photo! Now this step needs to be done quickly because the Modge Podge dries pretty fast. First, dump out a big glop of Modge Podge onto a paper plate to make the applying easier. Then cover your brush very generously with Modge Podge and apply it all over the canvas.


Quickly stick your photo on making sure it's straight and in place and smooth it out. 


Then hurry and apply more Modge Podge on top of the photo, brushing back and forth over the entire photo because it will dry with some mini streaks in it. So you will notice spots that didn't get an application. Then be sure to get the edges, which is very important because that's one way it holds together well. Make sure to get into the creases and corners.

Make sure it's all very even because although it dries clear, you will notice lumps and gumps if they're not smoothed out.


My husband thought this was a cool angle. We're getting all
sorts of arsty over here!
Step 3: Then put on your cans to dry! And after it dries, it's done! 


As you can see I've used this for photos and for some art pieces. This scripture, however, doesn't look too great with the grey. I should've used a darker grey or some other color. But as you can see, the principle is the same!

Before you go off and celebrate this simple, cheap craft, I suggest not using paper! Paper would make this cheaper than it already is, but I have tried it. Modge Podging paper onto canvas is not the way to go! It crinkled and stuck together and the ink smeared onto everything. It was awful. So go to a photo center and you should be good to go.

Another tip: I got my canvases at Wal-Mart 2 for $8. Add that up with the cost of the photo and each one is less than $10! Compare that to getting it actually printed on canvas and, well, it can't be comparable!

This application has seriously changed my life. This is definitely a thumbs up for a great Pin!

Share
Tweet
Pin
Share
2 comments
Newer Posts
Older Posts

Hi There

My purpose for having this blog is to inspire you for everyday life by adding more fun with my DIY tutorials or products from my Etsy shop. I like to keep things beautiful and easy.


Follow Along

  • Facebook
  • Instagram
  • Pinterest
  • Bloglovin'
  • Shop

recent posts

Sponsor

Blog Archive

  • ►  2017 (27)
    • ►  November (2)
    • ►  October (3)
    • ►  September (2)
    • ►  August (1)
    • ►  July (1)
    • ►  June (3)
    • ►  May (4)
    • ►  April (4)
    • ►  March (3)
    • ►  February (2)
    • ►  January (2)
  • ►  2016 (43)
    • ►  December (6)
    • ►  November (6)
    • ►  October (4)
    • ►  September (3)
    • ►  August (1)
    • ►  July (1)
    • ►  June (3)
    • ►  May (6)
    • ►  April (6)
    • ►  March (5)
    • ►  February (2)
  • ►  2015 (29)
    • ►  December (4)
    • ►  November (2)
    • ►  October (2)
    • ►  September (3)
    • ►  August (1)
    • ►  July (3)
    • ►  June (4)
    • ►  May (3)
    • ►  April (2)
    • ►  March (1)
    • ►  February (2)
    • ►  January (2)
  • ►  2014 (40)
    • ►  December (7)
    • ►  November (4)
    • ►  October (5)
    • ►  September (3)
    • ►  August (3)
    • ►  July (1)
    • ►  June (2)
    • ►  May (3)
    • ►  April (2)
    • ►  March (2)
    • ►  February (4)
    • ►  January (4)
  • ▼  2013 (32)
    • ►  December (2)
    • ►  November (5)
    • ►  October (3)
    • ►  September (4)
    • ▼  August (6)
      • Chaosity
      • Test Pin: DIY Pits Stain Remover
      • Giveaway Ends Tonight!
      • Homemade Quiet Book Ideas
      • A Giveaway From My Shop!
      • Test Pin & Tutorial: Photo on Canvas
    • ►  July (6)
    • ►  June (3)
    • ►  May (3)

Labels

  • DIY Tutorial
  • Holiday
  • Client Work
  • Freebie
  • Printable Download
  • Invitation Design
  • Realness
  • Birthday Party
  • My Products
  • Giveaway
  • Christmas Card
  • Craft Fair
  • Announcement
  • Gift
  • Baby Shower
  • Logo
  • VIDA Products

Search

Facebook Twitter Instagram Pinterest Bloglovin
FOLLOW ME @INSTAGRAM

Created with by BeautyTemplates