Facebook Instagram Pinterest Shop

Designs by TiffanyCo

  • Home
  • Freebies
  • DIY Projects
  • Parties
    • Birthday
    • Baby Shower
  • Portfolio
  • Design Service Prices
  • Etsy Shop
  • About
  • Contact
What do you give the person who has everything?? You know the type of people I'm talking about. They're usually your in-laws or grandparents. I finally figured out what the best types of gifts are for people in this category: things they use on a regular basis. Nice soaps, treats, calendars... just things you know they would buy and use anyways. The soap they usually buy may not be homemade with essential oils, but that's the point - just go up the scale so it's more classy even though when it comes down to it, it's really just soap. 

Anyways, where these hand towels come in is another idea for "the-person-who-has-everything." Sure, they can buy them from the store, but any mother would love something unique because it was made by you! 
Tools you will need:
hand towels
embellishments (ribbon, lace, etc.)
sewing machine
matching thread
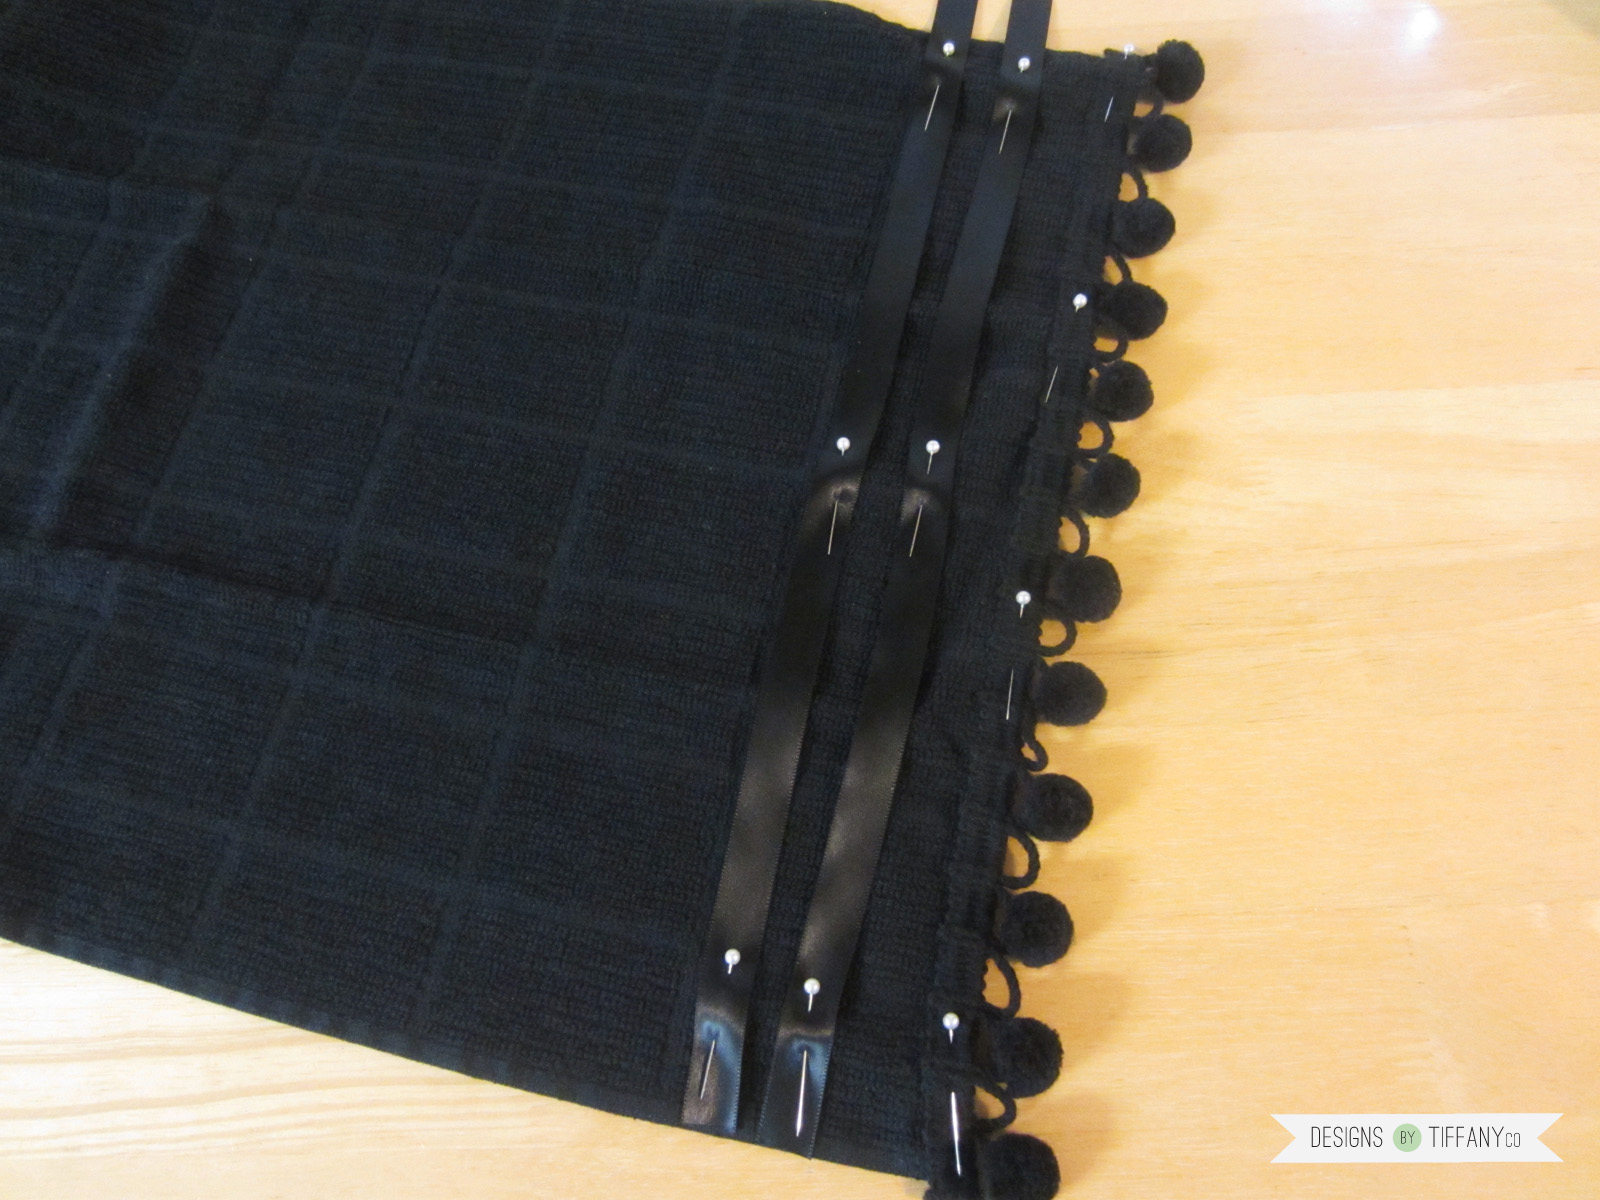
1. Lay out your towel and on the bottom of one side, measure and pin down your embellishments. I used 2 rows of satin ribbon and ball fringe. (Which can't be dried in the dryer, so take that into consideration for the person you're making it for.) I made the rows slightly longer in case my measurements were wrong. I didn't want to run out before it got to the edge.
 2. Using a zig-zag stitch, sew the ribbon on making sure you are getting both the ribbon and the towel. I didn't want the ribbon to flap up a bit, which is why I choose a zig-zag stitch opposed to just a straight stitch. For the ball fringe, I used a straight stitch going down each side to make sure it would stay on well.

3. Trim any excess embellishments off and either sew along those sides, burn them with a lighter, or use clear nail polish to prevent fraying.

4. And you're done! I only did one side of each towel, but you can do both sides if you would like.

Share
Tweet
Pin
Share
No comments
It's time for my annual Custom Christmas Card Giveaway! (said in Oprah Winfrey's voice. I'm feeling like I'm putting on a "My Favorite Things" episode...) I've done this for 2 years and it keeps getting more popular, so I figure it's what people want! 

Christmas cards have always been "a thing to do," and now I feel like every other company out there is taking advantage of it (which they should be doing - smart business strategies!) which makes it so competitive! There are SO many cute designs to choose from. Sometimes that can be a good thing and a bad thing. Sometimes too many options are overwhelming and sometimes the price isn't what you want to pay for, but end up paying for it because it was such a headache to get through it all!

That's where I step in with this giveaway (and custom orders - contact me if you want to get personal). If you have an idea you want, but can't find, I can custom make it for you. If you don't even have the time to even look around for cards, but still want to send out lovely cards to all of your friends and loved ones, I'm here for you. I can hold your hand and make a card that will make you want to shout from on top of a mountain that it is finished and you are able to cross off that one thing on your enormous Christmas to-do list. 

So this is what I can do and if you like what you see, enter into the giveaway and let me take care of the dirty work. You deserve it!

. . . . . . . .

Here is an example of this year's card. I usually send it out to my friends and family first, but I decided to order my cards from Overnight Prints this year and my cards won't get here until December 4th...! So you have the digital version to look at for now. When they're finished, they'll have rounded corners along with bright yellow envelopes, because how fun is that?! The envelopes match my daughter's shirt and compensates with the simple black and white design. I can't wait to show you when they get here! So stay tuned.


Past examples of my family cards can be found here and here.

So, onto the giveaway! This giveaway is for 1 digital file (or 2 if you want it front and back) for a custom Christmas card design. You'll need to print them yourself at your local print lab or use my favorite printing service, Overnight Prints. They always have sales on this time of year, so they're very reasonable for high quality professional service.

Good luck! And I can't wait to work with you!

a Rafflecopter giveaway

Share
Tweet
Pin
Share
7 comments
Back in June, I did a birthday party package for one of my nieces and her younger sister decided she wanted me to design her birthday party as well. My sister is capable to do it herself, but we do tradesies, so she takes advantage of it which I don't mind one bit! 

For this party, I designed the food cards, party favor tags, activity prints and the letters for the cake topper. 


Even though this Halloween themed party was for a birthday, it could still be used for a normal Halloween party, which is why I'm making it a freebie! Food cards, party favor tags, and activity prints can be downloaded for free here. 

Enjoy and have a fun Halloween!
Share
Tweet
Pin
Share
1 comments

I'm introducing gift card holder cards to my shop! It was time for me to have something new and I figured cards was a good place to start.

These aren't just any card, though, they're cards to put a gift card in! Uniquely sewn, the person who receives this will love the added surprise of originality.


Most of the cards have a color-coordinated pocket with the envelope, but check the shop for more detailed pictures of the specific cards if you want a closer look.

Aren't you in love with the rainbow of envelope colors?! I'll admit it's my favorite part of this whole card deal. I have the option of picking the envelope color of your choice if you're into mixing and matching. For example, I think the "Celebrate" card would look really good with a hot pink envelope and the yellow gift card pocket and you have the option of doing that if you like.

I know I don't have a wide variety of cards since I'm just starting this out, but I feel like I hit most of the big holidays and life experiences.

The "Celebrate" and "Party On Dude" could be used for birthdays, graduation, getting a new job, etc.

The "Make Like a Tree" holiday version is my only Christmas card and would work well for that certain person you never know what to get. Just leave it up to a Visa gift card and you're good to go!

The other "Make Like a Tree," "Let Me Be Your Sugar Daddy/Mama," and "Just Because" cards are great for anniversaries, Valentine's Day, or just because you want to spoil your loved one and let them know they're loved. Those are the cards I hope to be used the most because we could all use more love!


Now for what you've been waiting for, the GIVEAWAY! Follow the directions below to be entered to win 5 of these cards! Giveaway ends October 21st at 12am. Good luck!

**Gift cards are not included. Just the card and envelope. Winner has the option of picking out different envelope colors. Winner will be contacted via e-mail and will need to provide which 5 cards he/she would like along with envelope colors if desired. Winner will also need to provide a valid address for cards to be sent to.**


a Rafflecopter giveaway
If you're not interested the giveaway, the cards will be on sale now until October 29th. Check the shop for sale prices.
Share
Tweet
Pin
Share
5 comments

I wish I wasn't so late in posting this, but after Halloween, this wreath can still be used for a festive fall Thanksgiving wreath! So I feel it works well in both September and November. 

I had a lot of fun creating the pinecone wreath I made last year and felt the need to bedazzle a fall wreath. Where my troubles came in was how hot it has been this month! I'm talking like it's still summer - 80-90º... And I have a metal screen door that just soaks up the heat and it was melting the hot glue on my wreath! So it kept falling apart... But now that I've been able to fix it up and glue the life out of it and the weather is cooling down a bit, it will be proudly hanging until the first of October. 

Tools You Will Need:
wreath base (I used a metal one, but I would 
suggest using a wicker one. It will save you more time.)
scraps of creme/neutral colored fabric (if using metal wreath)
plastic leaves
decorative elements/fillers
last name initial 
pliers
hot glue gun + lots of glue sticks
1. Skip steps 1-2 if using a wicker wreath. 
If using a metal wreath, cut out strips of fabric, about 1"x2.5". I can't say how many, just a lot. If you are buying fabric to use instead of using scraps, I would start with just a quarter yard. It should be nothing more. 

2. Tie strips into knots around the wreath. It doesn't need to be super full, but just enough to use as a base. I found that just glueing the leaves straight onto the metal wasn't helping much and they needed more of a base for support. Which is why if you are using a wicker wreath, you wouldn't need to complete this step because there is lots of volume to work with.
3. After your wreath is full of knots, you're ready to start glueing on the leaves! Using the pliers, cut the leaves off the stems. Lay onto wreath before glueing to make sure they look how you want. Then start glueing.

4. Once all of the leaves are glued, trim off any fabric that might be visible.
5. Add in your decorative elements/fillers in places where there might be gaps. Use lots of glue and let sit for 24 hours before hanging.

Share
Tweet
Pin
Share
No comments
Newer Posts
Older Posts

Hi There

My purpose for having this blog is to inspire you for everyday life by adding more fun with my DIY tutorials or products from my Etsy shop. I like to keep things beautiful and easy.


Follow Along

  • Facebook
  • Instagram
  • Pinterest
  • Bloglovin'
  • Shop

recent posts

Sponsor

Blog Archive

  • ▼  2017 (27)
    • ▼  November (2)
      • New Site!
      • Circus Birthday Invitation
    • ►  October (3)
    • ►  September (2)
    • ►  August (1)
    • ►  July (1)
    • ►  June (3)
    • ►  May (4)
    • ►  April (4)
    • ►  March (3)
    • ►  February (2)
    • ►  January (2)
  • ►  2016 (43)
    • ►  December (6)
    • ►  November (6)
    • ►  October (4)
    • ►  September (3)
    • ►  August (1)
    • ►  July (1)
    • ►  June (3)
    • ►  May (6)
    • ►  April (6)
    • ►  March (5)
    • ►  February (2)
  • ►  2015 (29)
    • ►  December (4)
    • ►  November (2)
    • ►  October (2)
    • ►  September (3)
    • ►  August (1)
    • ►  July (3)
    • ►  June (4)
    • ►  May (3)
    • ►  April (2)
    • ►  March (1)
    • ►  February (2)
    • ►  January (2)
  • ►  2014 (40)
    • ►  December (7)
    • ►  November (4)
    • ►  October (5)
    • ►  September (3)
    • ►  August (3)
    • ►  July (1)
    • ►  June (2)
    • ►  May (3)
    • ►  April (2)
    • ►  March (2)
    • ►  February (4)
    • ►  January (4)
  • ►  2013 (32)
    • ►  December (2)
    • ►  November (5)
    • ►  October (3)
    • ►  September (4)
    • ►  August (6)
    • ►  July (6)
    • ►  June (3)
    • ►  May (3)

Labels

  • DIY Tutorial
  • Holiday
  • Client Work
  • Freebie
  • Printable Download
  • Invitation Design
  • Realness
  • Birthday Party
  • My Products
  • Giveaway
  • Christmas Card
  • Craft Fair
  • Announcement
  • Gift
  • Baby Shower
  • Logo
  • VIDA Products

Search

Facebook Twitter Instagram Pinterest Bloglovin
FOLLOW ME @INSTAGRAM

Created with by BeautyTemplates